本文基于 CTFd Version 3.4.3 开发,可能存在源码不相同的情况,阅读时请注意文章时效性。机器人会一直更新,后续应该会有一二三血播报等更详尽的功能
注:本文不做机器人相关代码更改,直接利用nonebot自带接口实现
前端页面修改
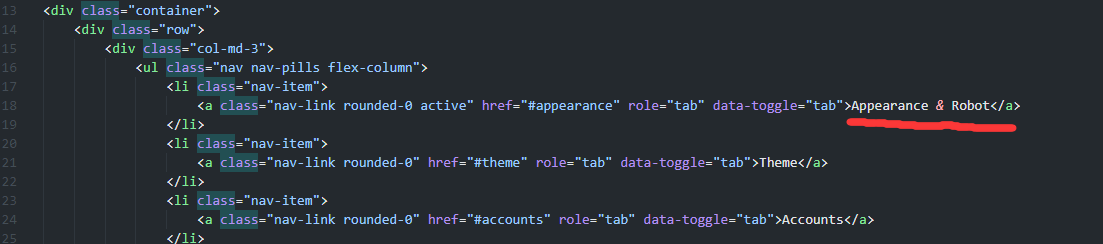
config.html
打开CTFd/CTFd/themes/admin/templates/config.html,更改左侧栏目标题
apperance.html
打开CTFd/CTFd/themes/admin/templates/configs/appearance.html,在其中插入代码,完整html如下
因可能存在CTFd不同版本页面不同的问题,请视具体情况更改html页面
1
2
3
4
5
6
7
8
9
10
11
12
13
14
15
16
17
18
19
20
21
22
23
24
25
26
27
28
29
30
31
32
33
34
35
36
37
38
39
40
41
42
43
44
45
46
47
48
49
50
51
52
53
54
55
56
57
58
59
60
61
62
63
64
65
66
67
68
69
70
71
72
73
| <div role="tabpanel" class="tab-pane config-section active" id="appearance">
<form method="POST" autocomplete="off" class="w-100">
<div class="form-group">
<label for="ctf_name">
Competition Name
<small class="form-text text-muted">Competition name displayed instead of a logo</small>
</label>
<input class="form-control" id='ctf_name' name='ctf_name' type='text' placeholder="CTF Name"
{% if ctf_name is defined and ctf_name != None %}value="{{ ctf_name }}"{% endif %}>
</div>
<div class="form-group">
<label>
CTF Description<br>
<small class="form-text text-muted">
Description for the CTF
</small>
</label>
<textarea class="form-control" type="text" id="ctf_description" name="ctf_description" rows="5">{{ ctf_description }}</textarea>
</div>
<div class="form-group">
<label for="bot-ip">
Bot Address<br>
<small class="form-text text-muted">
the address of QQ-bot
</small>
<small class="form-text text-muted">
eg. 127.0.0.1:1234
</small>
</label>
<input class="form-control" id='bot-ip' name='bot_ip' type='text'
{% if bot_ip is defined and bot_ip != None %}value="{{ bot_ip }}"{% endif %}>
</div>
<div class="form-group">
<label for="group-id">
QQ Group Number<br>
</label>
<input class="form-control" id='group-id' name='group_id' type='text'
{% if group_id is defined and group_id != None %}value="{{ group_id }}"{% endif %}>
</div>
<div class="form-group">
<label for="bot-text">
Message<br>
<small class="form-text text-muted">
ep. 恭喜%s做出题目%s,默认第一个参数为用户名,第二个参数为题目名称
</small>
</label>
<input class="form-control" id='bot-text' name='bottext' type='text'
{% if bottext is defined and bottext != None %}value="{{ bottext }}"{% endif %}>
</div>
<div class="form-group">
<label for="botof">
Turn on the Bot
</label>
<div>
<select class="form-control custom-select" id="botof" name="bot">
<option value=0 {% if bot == 0 %}selected{% endif %}>
OFF
</option>
<option value=1 {% if bot == 1 %}selected{% endif %}>
ON
</option>
</select>
</div>
</div>
<button type="submit" class="btn btn-md btn-primary float-right">Update</button>
</form>
</div>
|
效果展示
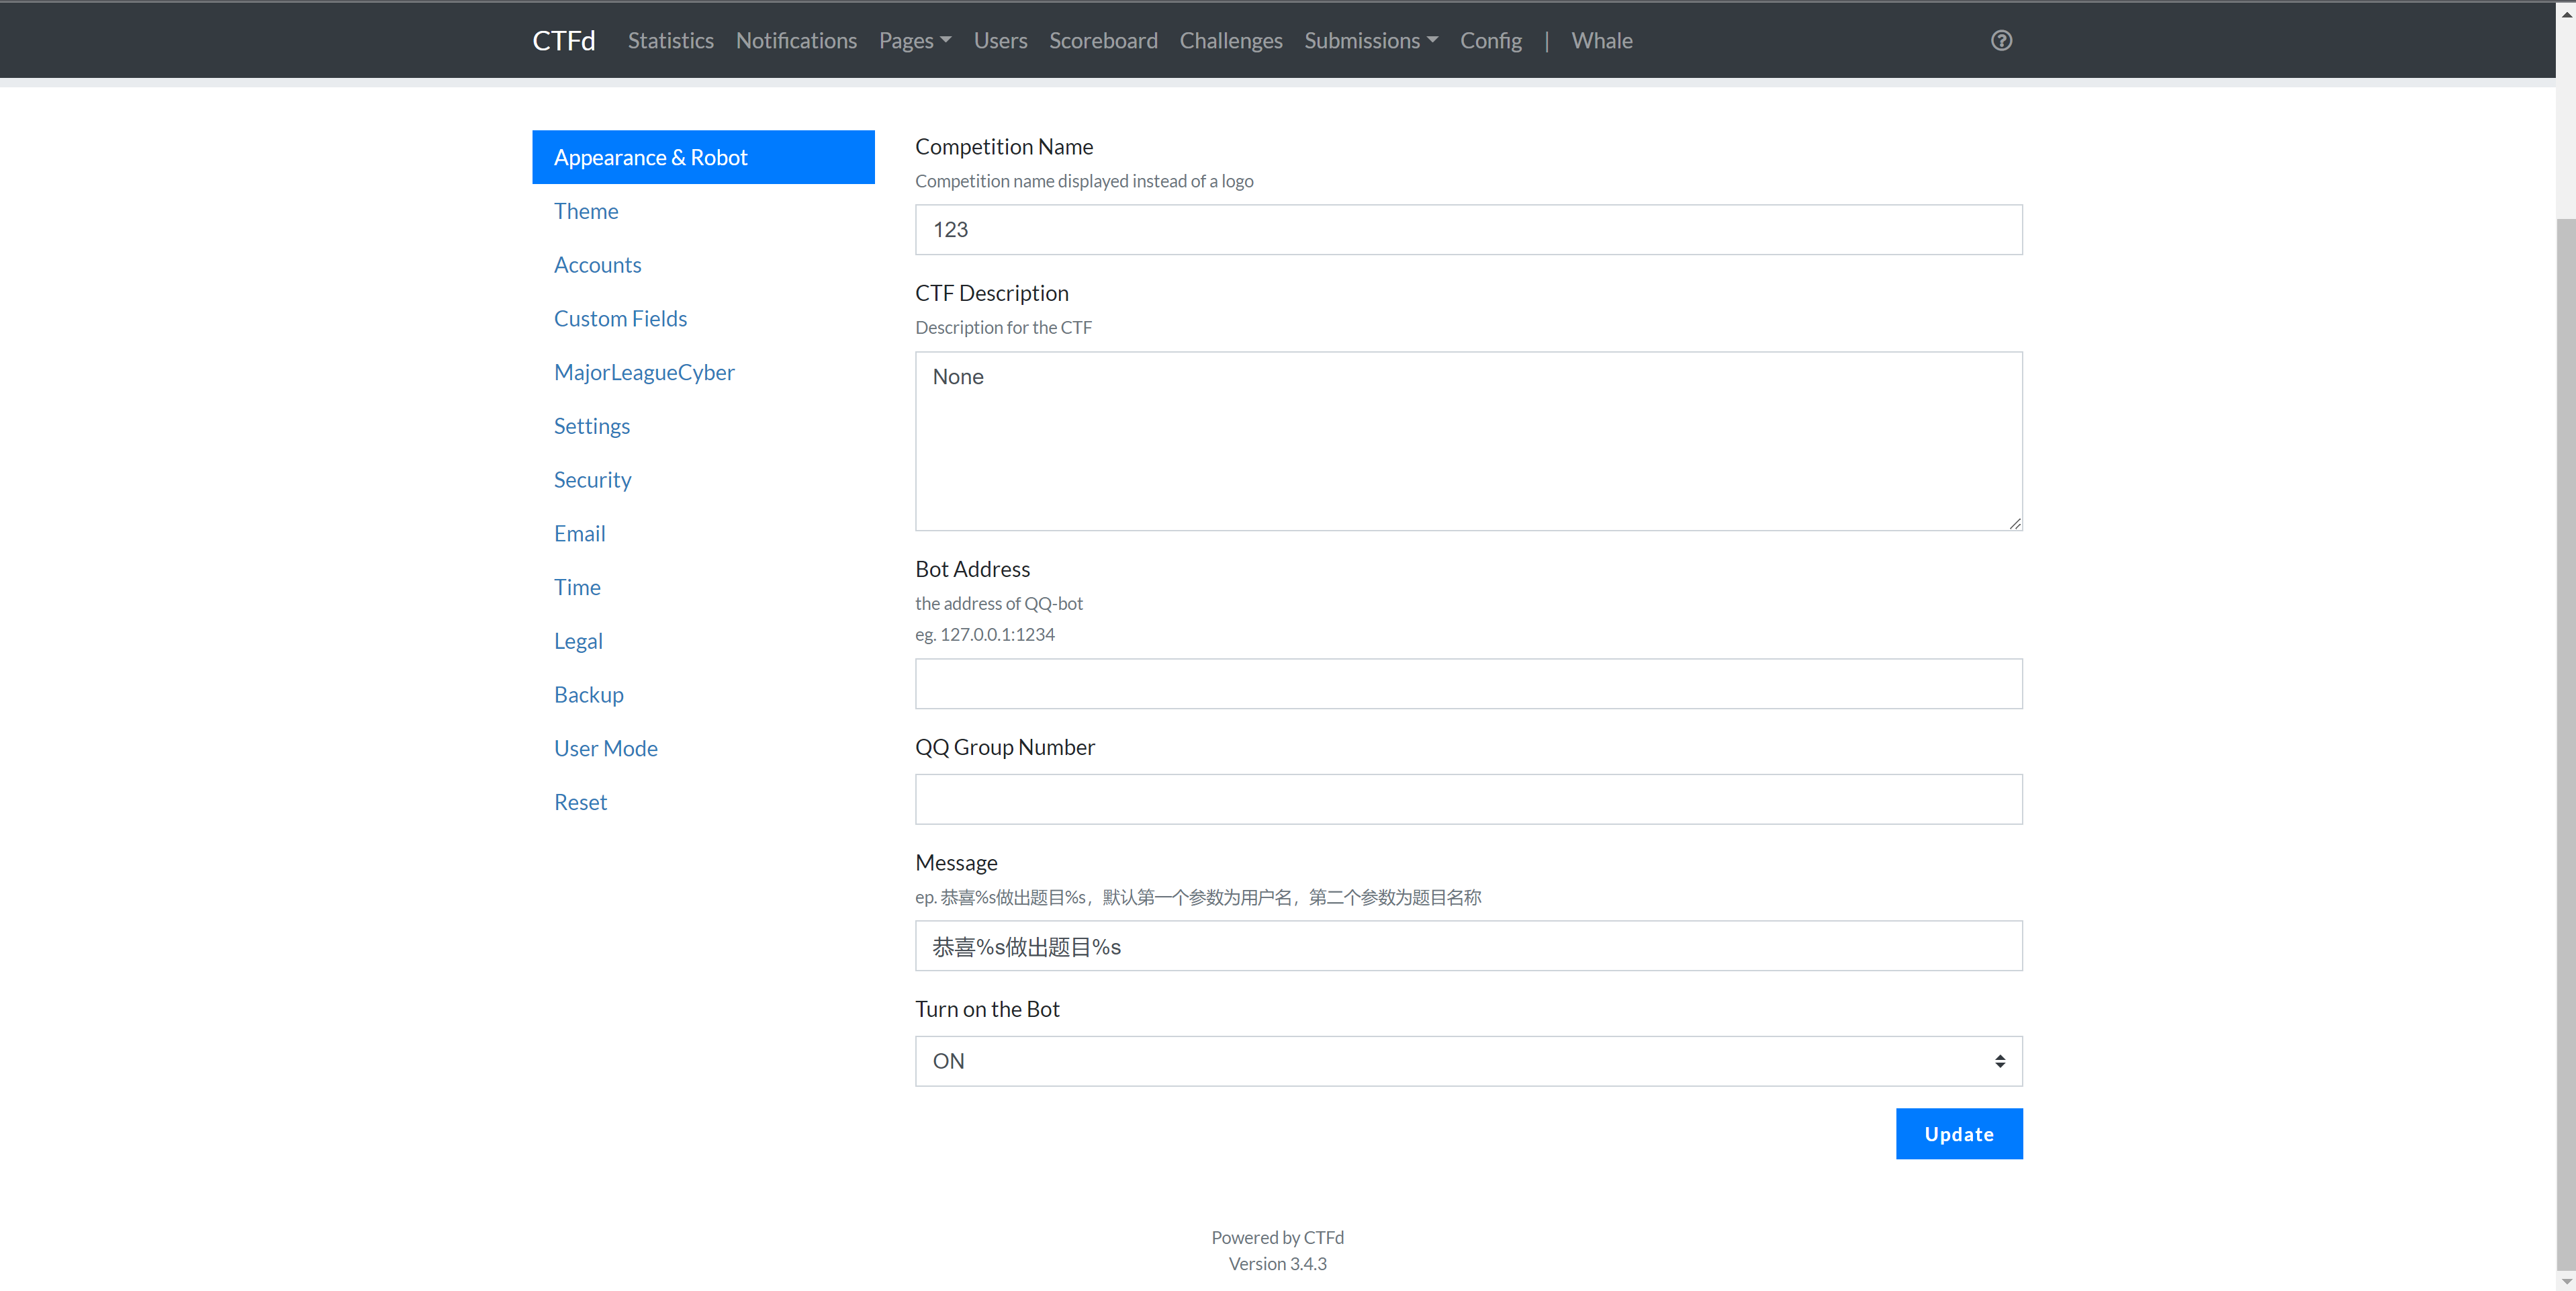
这样就可以在设置页面随时更改了, Bot Address是Bot接收http请求的地址,QQ Group Number是机器人所在的qq群号。如果机器人运行的地址发生变化,或想更改发消息的群号,只需在这里更改即可,目前还不支持同时多个群发送消息,准备等到添加一二三血功能时一起添加。
后端更改
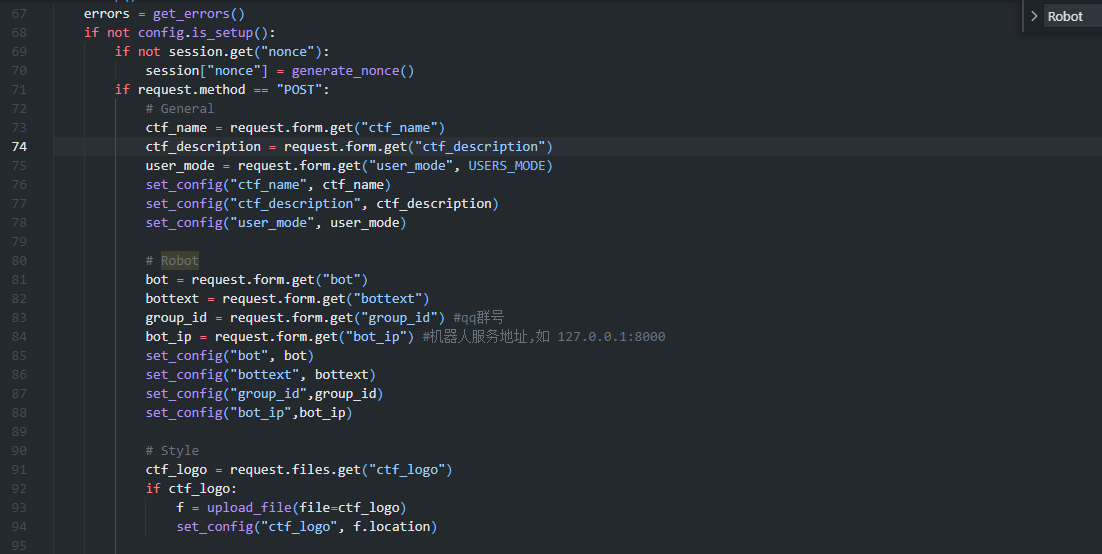
view.py
打开CTFd/CTFd/views.py,添加几个变量,用于接收html页面数据
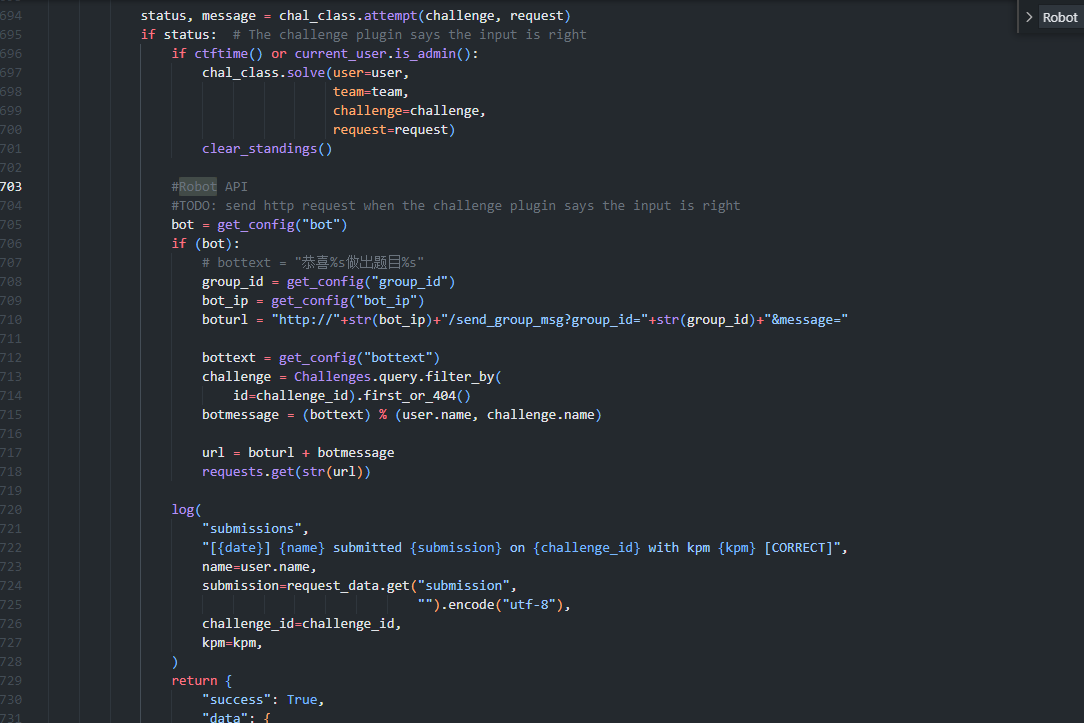
challenges.py
打开CTFd/CTFD/api/v1/challenges.py,在解题成功后,调用机器人API即可
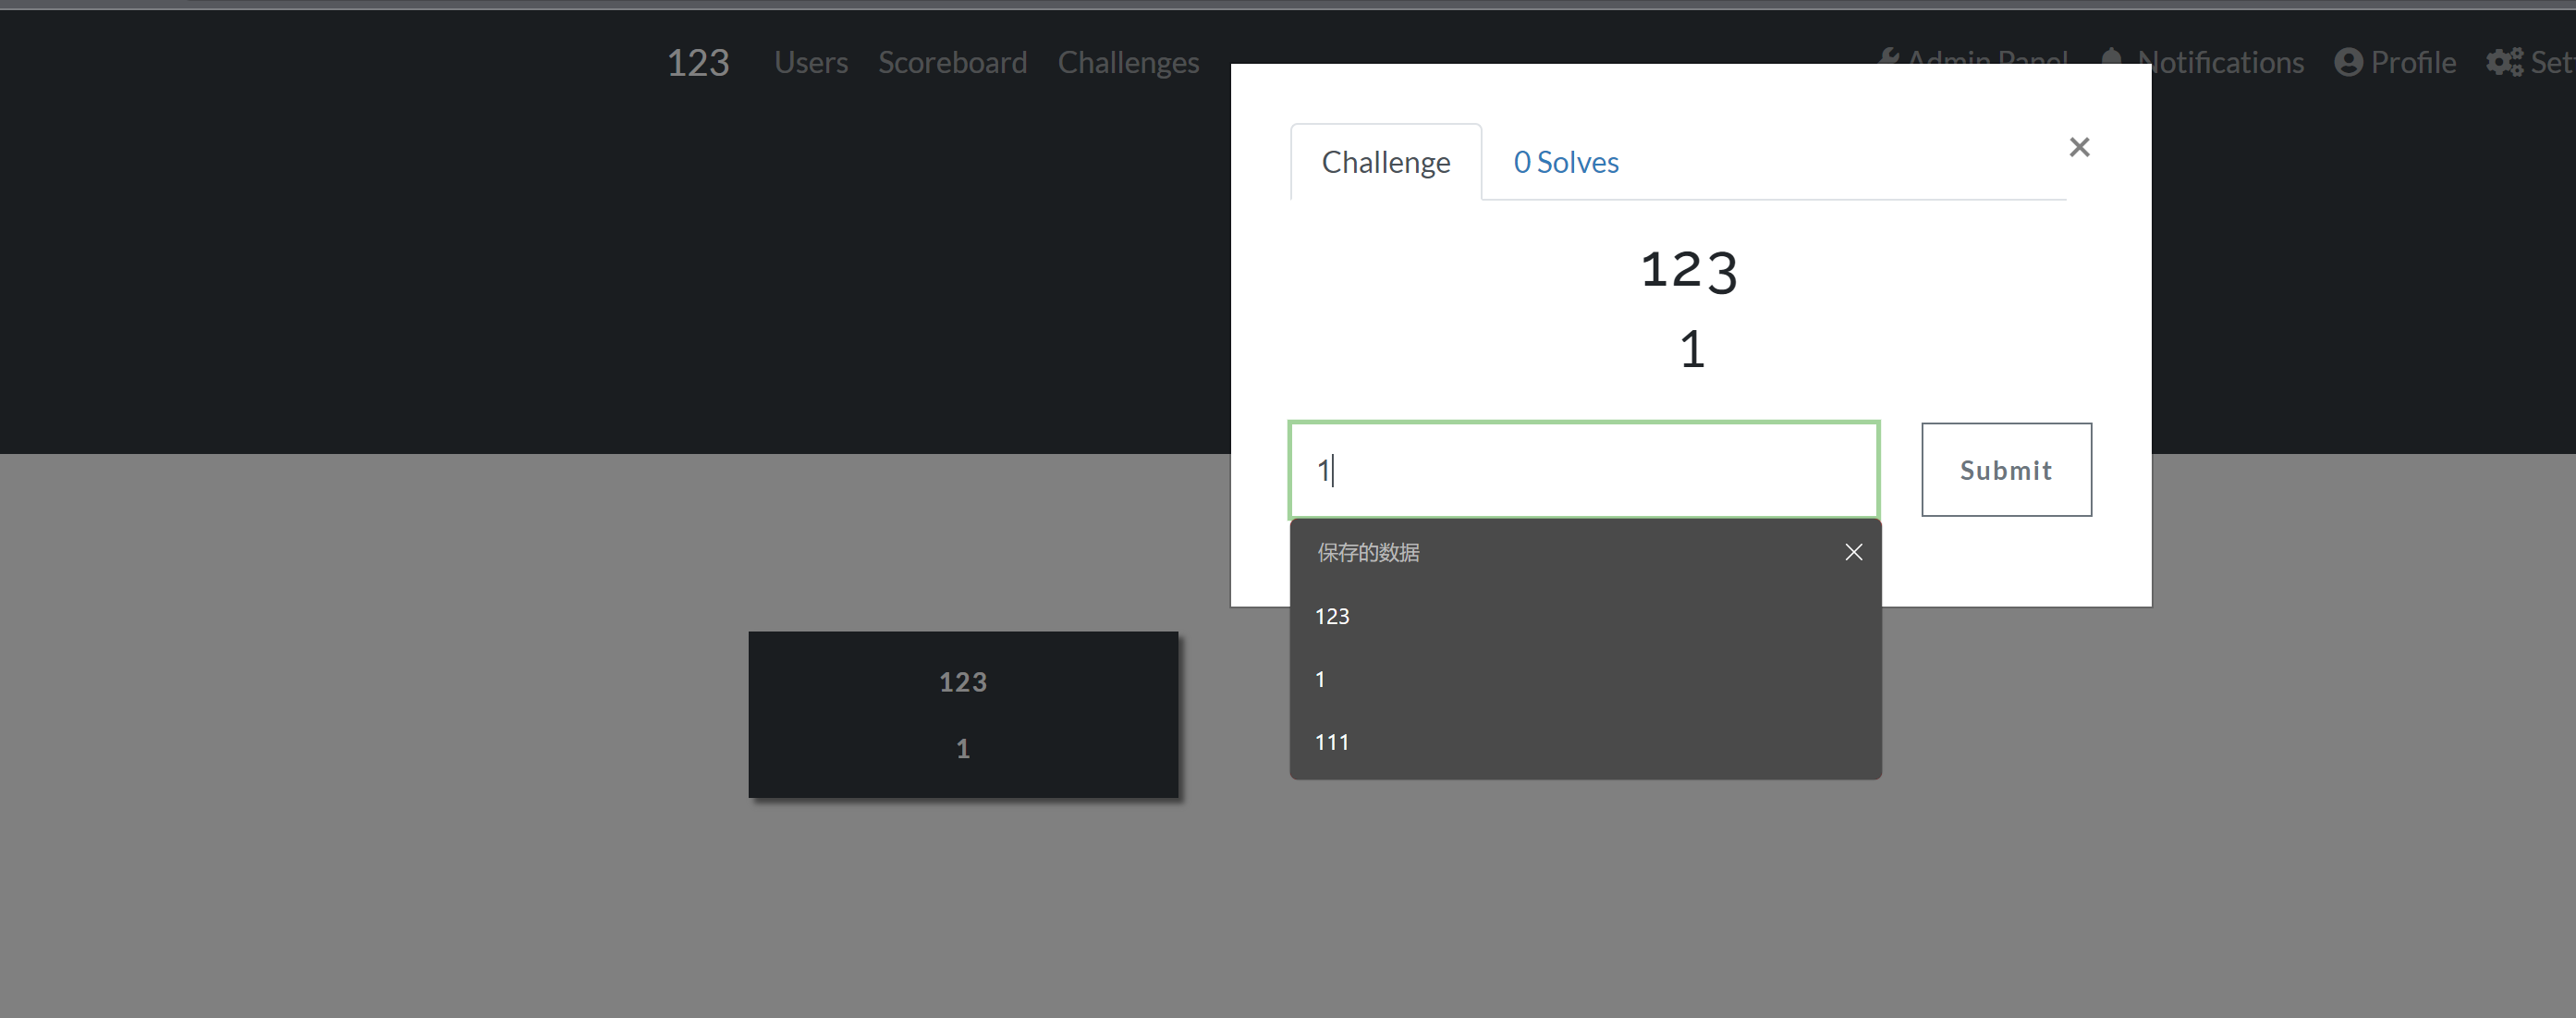
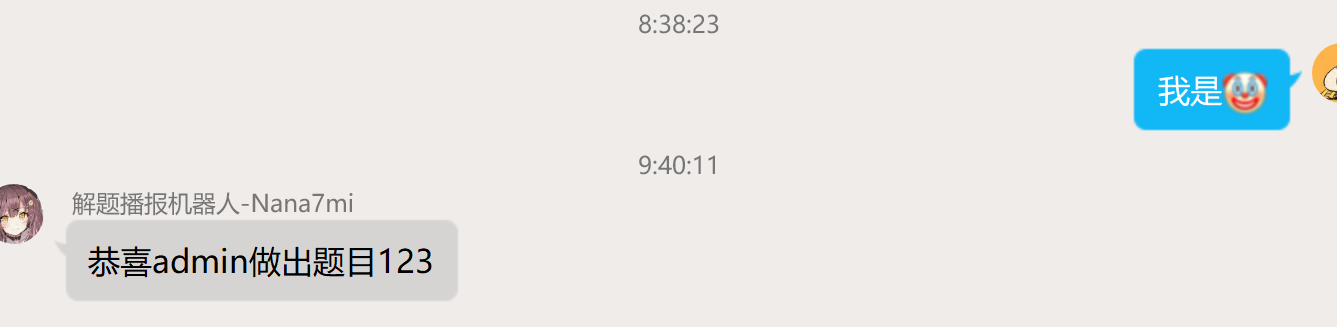
运行演示